
In this post, I’m going to share with you how you can create your very own custom domain URL shortener using Cloudflare Workers. Whether you’re a web developer looking to add another tool to your belt, a business owner wanting to brand your links without the hefty price tag, or just someone who loves to tinker with web technologies, this step-by-step guide is for you.
As a web developer and tech enthusiast, I’ve always been fascinated by the little things that make the internet more efficient and user-friendly. One day, while sharing a particularly long and unwieldy URL with a colleague, I found myself wishing for a simple, personalized way to shorten links. Sure, there are plenty of URL shortening services out there, but I wanted something that felt more “me” – something I could customize and control.
That’s when I stumbled upon the idea of creating my own custom URL shortener using Cloudflare Workers. It was like finding a hidden treasure in the vast sea of web technologies. Not only could I shorten URLs, but I could do it with my own domain name, for free! The excitement of this discovery reminded me of the first time I deployed a website – that rush of empowerment and endless possibilities.
What made this discovery even more exciting was realizing that it could serve as a fantastic, free alternative to popular services like Bit.ly or TinyURL for creating branded short links on a custom domain. Many businesses and individuals pay good money for this kind of functionality, but here is a way to achieve the same result without spending a dime.
Step 1: Register a Domain Name (Use a Short Domain)
The first step in creating your custom URL shortener is to register a domain name. This will be the foundation of your branded short links, so choose wisely!
Here are some tips to help you select the perfect domain:
- Keep it short: The whole point of a URL shortener is to create concise links. Look for domain names with 3-5 characters if possible. This could be an abbreviation, acronym, or a catchy word.
- Make it memorable: Choose something easy to remember and type. This will make it easier for you and others to use your shortened links.
- Consider your brand: If you’re using this for a business or personal brand, try to align the domain with your existing brand identity.
- Check availability: Short, catchy domains are in high demand. You might need to get creative or consider alternative top-level domains (TLDs) like .io, .co, or .me if your first choice isn’t available.
- Think about the TLD: While .com is popular, don’t shy away from other TLDs. Some, like .link or .click, could be particularly fitting for a URL shortener.
Here are some examples to inspire you:
- abc.link
- go.io
- shrt.co
- zap.me
Once you’ve chosen your domain, you’ll need to purchase it from a domain registrar. Some popular options include:
- Namecheap
- GoDaddy
- Cloudflare (Recommended – which is also very convenient since we’ll be using Cloudflare Workers)
Remember, while the domain will cost money, it’s a one-time purchase per year, and the rest of our URL shortener setup will be free using Cloudflare Workers.
Pro tip: Before finalizing your purchase, make sure the domain isn’t associated with any spam or malicious activity. You can check its history using tools like Domain Tools or Wayback Machine.
With your shiny new domain in hand, you’re ready to move on to the next step: setting up Cloudflare for your domain. But we’ll cover that in the next section.
Step 2: Configure DNS Records for Your Domain
Now that you have your domain, it’s time to set up the DNS configuration. This step is crucial for ensuring that your Cloudflare Workers function correctly with your newly registered domain.
Let’s walk through the process:
1. Add Your Domain to Cloudflare
- If you haven’t already done so, create a free Cloudflare account.
- In your Cloudflare dashboard, click “Add a Site” and enter your domain name.
- Cloudflare will scan for existing DNS records. Delete any records it finds (unless you’re also using the domain for email or other important services, in which case, keep those).
2. Update Nameservers (Ignore this step if your domain is registered with Cloudflare)
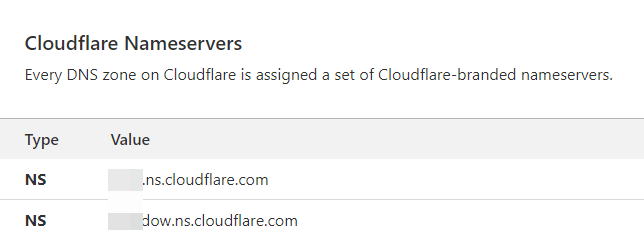
- Cloudflare will provide you with a set of nameservers.
- Go to your domain registrar’s website and replace the existing nameservers with the ones provided by Cloudflare.
- This step may take up to 24 hours to propagate globally.
3. Configure DNS Records
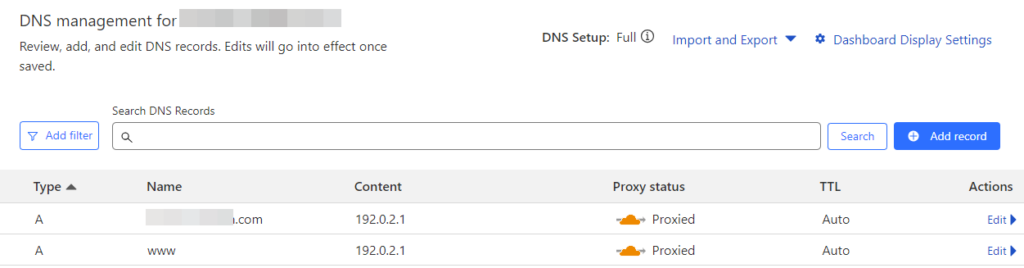
- In your Cloudflare DNS settings, we’ll add two new A records.
- Add the following:
Type: A
Name: @
Content: 192.0.2.1
TTL: Auto
Proxy status: Proxied (orange cloud - very important)

Type: A
Name: www
Content: 192.0.2.1
TTL: Auto
Proxy status: Proxied (orange cloud - very important)
This 192.0.2.1 IP is a special “dummy” address. It’s reserved for documentation and testing, which makes it perfect for our needs.
4. Enable Cloudflare Proxy
- Make sure the proxy status (orange cloud icon) is enabled for your DNS record.
- This allows Cloudflare to proxy your traffic and is necessary for Cloudflare Workers to function.
5. Verify Configuration
- Once the nameserver change has propagated, Cloudflare will show your domain as “Active”.
- You can verify this in the Cloudflare dashboard.
The key point here is that we’re not pointing your domain to any actual web hosting. The 192.0.2.1 address is just a placeholder. Your Cloudflare Worker, which we’ll set up next, will intercept all requests to your domain and handle the URL shortening logic.
Pro Tip: This setup means you don’t need to pay for or manage any web hosting. Cloudflare Workers will handle all the heavy lifting, making this solution not only free but also incredibly lightweight and easy to maintain.
With your DNS properly configured, you’re now ready to move on to the exciting part – setting up your Cloudflare Worker to handle the URL shortening.
Step 3: Creating a Cloudflare Worker
Now that we have our domain configured in Cloudflare, it’s time to create the Worker that will handle our redirects. Cloudflare Workers provide a serverless execution environment that allows us to run our code at the edge, close to our users for optimal performance.
1. Create a Cloudflare Worker
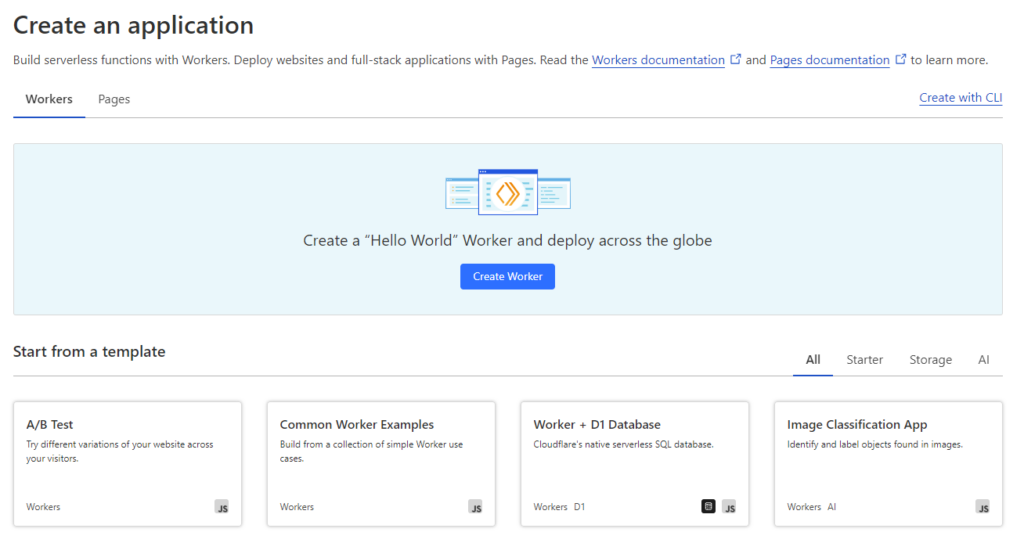
- Accessing the Workers Section:
- Log into your Cloudflare dashboard.
- Navigate to the “Workers” section from the sidebar.
- Click on “Create a Service” if this is your first Worker, or “Create Worker” if you already have existing Workers.
- Name Your Worker:
- Choose a descriptive name for your Worker, such as “bulk-redirects-handler”.
- Click “Create Service” to proceed to the editor.
- Writing the Worker Script:
- In the editor, replace the default code with the redirect handler script:
export default {
 async fetch(request) {
 const redirectMap = new Map([
 ["google", "https://www.google.com?subId1=google"],
 ["bing", "https://www.bing.com?subId1=bing"],
 // Add more redirects here as needed
 ]);

 const url = new URL(request.url);
 console.log("Full URL:", url.toString());
 console.log("Hostname:", url.hostname);
 console.log("Pathname:", url.pathname);

 let path = url.pathname.toLowerCase().replace(/^\//, '').split('/')[0];

 if (url.hostname.includes('workers.dev')) {
 path = url.pathname.toLowerCase().replace(/^\//, '').split('/')[1] || '';
 }

 console.log("Processed path:", path);

 const location = redirectMap.get(path);
 console.log("Redirect location:", location);

// Change to 301 for Permanent redirect
 if (location) {
 return Response.redirect(location, 302);
 }

 // If request not in map, return a 404 or your preferred fallback
 return new Response(`Not Found: ${path}`, { status: 404 });
 },
}; - Understanding the Script:
- We define a redirectMap that contains our short paths and their corresponding full URLs.
 ["google", "https://www.google.com?subId1=google"],

yourshorturl.com/google redirects to -> https://www.google.com?subId1=google

 ["bing", "https://www.bing.com?subId1=bing"],

yourshorturl.com/bing redirects to -> https://www.bing.com?subId1=bing
- The script processes incoming requests, extracts the path, and checks if it matches any of our defined redirects.
- If a match is found, it returns a 302 (Temporary Redirect) to the corresponding URL.
- If no match is found, it returns a 404 Not Found response.
- Testing the Worker:
- Use the “Quick Edit” feature in the Cloudflare dashboard to make changes and test your Worker.
- You can use the provided HTTP testing tool to simulate requests and see how your Worker responds.
- Deploying the Worker:
- Once you’re satisfied with your tests, click “Save and Deploy” to make your Worker live.
- Setting Up Worker Routes:
- After deploying, go to the “Triggers” tab for your Worker.
- Add a route that matches your domain, such as *recommends.link/*.
- This ensures that all requests to your domain are handled by this Worker.
- Verifying the Setup:
- Try accessing a few of your redirect paths (e.g., https://recommends.link/url-shortener-guide) to ensure they’re working as expected.
- Check the Workers Logs in your Cloudflare dashboard to see the console output and verify that the paths are being processed correctly.
Step 4: More Customizations (Optional)
Dynamic Redirects with Cloudflare KV
To make our redirect system more flexible and easier to manage, we can use Cloudflare KV (Key-Value) storage to store our redirects:
Create a KV Namespace:
- In your Cloudflare dashboard, go to Workers > KV.Click “Create namespace” and name it (e.g., “REDIRECT_MAP”).
- Go to your Worker’s settings.Under “KV Namespace Bindings”, add a new binding. Choose your KV namespace and give it a variable name (e.g., REDIRECTS).
 export default {
 async fetch(request, env) {
 const url = new URL(request.url);
 const path = url.pathname.toLowerCase().replace(/^\//, '').split('/')[0];

 const location = await env.REDIRECTS.get(path);

 if (location) {
 return Response.redirect(location, 301);
 }

 return new Response(`Not Found: ${path}`, { status: 404 });
 },
 };
You can now add, update, or remove redirects by modifying the KV store without changing the Worker code.
Parameterized Redirects
Allow for dynamic parameters in your redirects:
 export default {
 async fetch(request, env) {
 const url = new URL(request.url);
 const [path, ...params] = url.pathname.toLowerCase().replace(/^\//, '').split('/');

 let location = await env.REDIRECTS.get(path);

 if (location) {
 // Replace placeholders with actual parameters
 params.forEach((param, index) => {
 location = location.replace(`{${index}}`, param);
 });
 return Response.redirect(location, 301);
 }

 return new Response(`Not Found: ${path}`, { status: 404 });
 },
 };
With this setup, you could have a KV entry like “product” : “https://mystore.com/item/{0}/details” and use it as yourshortlink.com/product/12345.
Click Tracking and Analytics
Implement basic analytics by logging redirect events:
 export default {
 async fetch(request, env) {
 const url = new URL(request.url);
 const path = url.pathname.toLowerCase().replace(/^\//, '').split('/')[0];

 const location = await env.REDIRECTS.get(path);

 if (location) {
 // Log the redirect event
 await env.REDIRECTS.put(`${path}_clicks`, (parseInt(await env.REDIRECTS.get(`${path}_clicks`) || '0') + 1).toString());
 return Response.redirect(location, 301);
 }

 return new Response(`Not Found: ${path}`, { status: 404 });
 },
 };
Custom Error Pages
Instead of a plain text 404 response, return a custom HTML page:
 const notFoundPage = `
 <!DOCTYPE html>
 <html lang="en">
 <head>
 <meta charset="UTF-8">
 <meta name="viewport" content="width=device-width, initial-scale=1.0">
 <title>Link Not Found</title>
 <style>
 body { font-family: Arial, sans-serif; text-align: center; padding-top: 50px; }
 </style>
 </head>
 <body>
 <h1>Oops! Link Not Found</h1>
 <p>The short link you're looking for doesn't exist.</p>
 </body>
 </html>
 `;

 // In your fetch function:
 return new Response(notFoundPage, {
 status: 404,
 headers: { 'Content-Type': 'text/html' }
 });
Rate Limiting
Implement basic rate limiting to prevent abuse:
 export default {
 async fetch(request, env) {
 const ip = request.headers.get('CF-Connecting-IP');
 const rateLimitKey = `ratelimit:${ip}`;
 const currentRequests = parseInt(await env.REDIRECTS.get(rateLimitKey) || '0');

 if (currentRequests > 100) { // 100 requests per minute limit
 return new Response('Rate limit exceeded', { status: 429 });
 }

 await env.REDIRECTS.put(rateLimitKey, (currentRequests + 1).toString(), {expirationTtl: 60});

 // Rest of your redirect logic here
 },
 };
A/B Testing
Implement simple A/B testing for your redirects:
 export default {
 async fetch(request, env) {
 const url = new URL(request.url);
 const path = url.pathname.toLowerCase().replace(/^\//, '').split('/')[0];

 const locationA = await env.REDIRECTS.get(`${path}_A`);
 const locationB = await env.REDIRECTS.get(`${path}_B`);

 if (locationA && locationB) {
 const location = Math.random() < 0.5 ? locationA : locationB;
 return Response.redirect(location, 301);
 }

 // Fallback to normal redirect if A/B test isn't set up
 const location = await env.REDIRECTS.get(path);
 if (location) {
 return Response.redirect(location, 301);
 }

 return new Response(`Not Found: ${path}`, { status: 404 });
 },
 };
These customizations and expansions add significant functionality to your bulk redirect system, making it more flexible, powerful, and informative. Each of these features can be further refined and expanded based on your specific needs and use cases.
Summary: Creating a Custom Link Shortener with Cloudflare Workers
Throughout this blog post, we’ve explored how to create a powerful and flexible custom URL shortener using Cloudflare Workers. This solution offers a free and efficient approach to creating short links at scale.
TL;DR:
- Cloudflare Workers provide a serverless platform for implementing custom redirect logic with global distribution and low latency.
- Proper DNS configuration and Worker Routes setup are crucial for connecting your custom domain to the Worker.
- A simple JavaScript-based Worker can handle complex redirect scenarios efficiently.
- Cloudflare’s Key-Value (KV) storage can be leveraged to create dynamic, easily manageable redirect maps.
- Advanced features like parameterized redirects, click tracking, custom error pages, rate limiting, and A/B testing can be implemented within the Worker ecosystem.
- This system offers significant advantages over traditional redirect methods, including improved performance, easier management, and enhanced flexibility.
The solution we’ve built offers several benefits:
- Scalability: Handles millions of redirects without performance degradation.
- Flexibility: Easily add, modify, or remove redirects without changing the core logic.
- Performance: Leverages Cloudflare’s global network for fast redirects worldwide.
- Customization: Allows for advanced features like analytics and A/B testing.
- Cost-effectiveness: Utilizes serverless architecture, potentially reducing hosting costs.
- Free alternative to popular services like Bit.ly or Yourls for creating branded short links on a custom domain.
Now that you understand the power and flexibility of this Cloudflare Worker-based redirect system, it’s time to put it into action:
- If you haven’t already, sign up for a Cloudflare account and familiarize yourself with the Workers platform.
- Implement this system for your own branded short links or bulk redirects.
- Experiment with the advanced features we’ve discussed to tailor the system to your specific needs.
- Share your experiences or ask questions in the comments section below. Your insights could help others in the community!
- For more advanced use cases or custom implementations, consider reaching out to a Cloudflare Workers expert or consulting service.
Stay curious, keep learning, and don’t hesitate to push the boundaries of what’s possible with tools like Cloudflare Workers.