Here is a quick walkthrough of how you sign up for the Starter Plan.
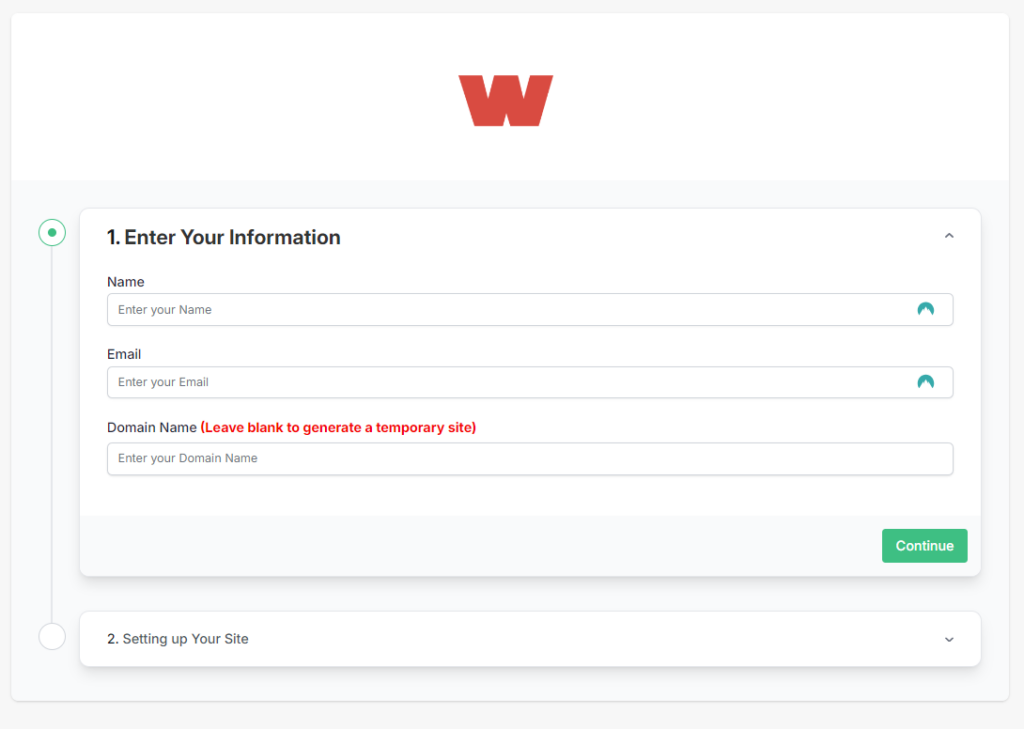
1. Click on the signup link

Fill in your name and email address.
Leave the Domain Name field empty, this will generate a temporary domain name for you.
You will be able to connect your custom domain later when you decide to go live.
Click Continue.
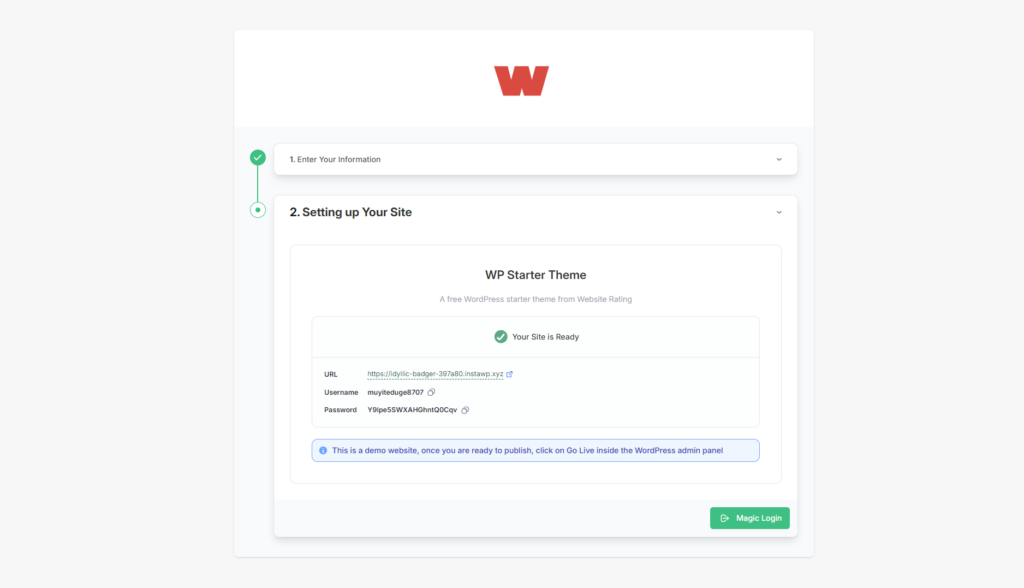
2. The Starter theme is created

Here is your temporary URL, Username and Password for your WordPress site (important: save this information somewhere).
Click the Magic Login link to login to your WordPress site
3. Customize your WordPress site

Now, you get to work on and customize your site.
When you are finished and you are ready to go live with the site, click on the Go Live button in the top address bar.
4. Choose your hosting plan

You can choose where you want the server location to be: either in Burbank, California (US) or in Amsterdam, Netherlands (EU).
Click Continue and fill in your Credit Card details.
Click Continue and confirm your details.
And the final step is that your WordPres site is set up, with information and login to your hosting dashboard.
