
Ready to launch your website or blog? This guide will walk you through signing up with InMotion Hosting and installing WordPress on their platform. It’s a surprisingly simple process, even if you’re new to web hosting.
InMotion Hosting is a well-established and respected hosting provider known for its reliability and excellent customer support. I’ve personally used their services and have had a positive experience overall. You can find my detailed thoughts in my InMotion Hosting review.
Signing up for a hosting plan with InMotion Hosting is a breeze, and installing WordPress is even easier. Let’s get started.
How To Sign Up With InMotion Hosting
Here’s a step-by-step breakdown of the InMotion signup process:
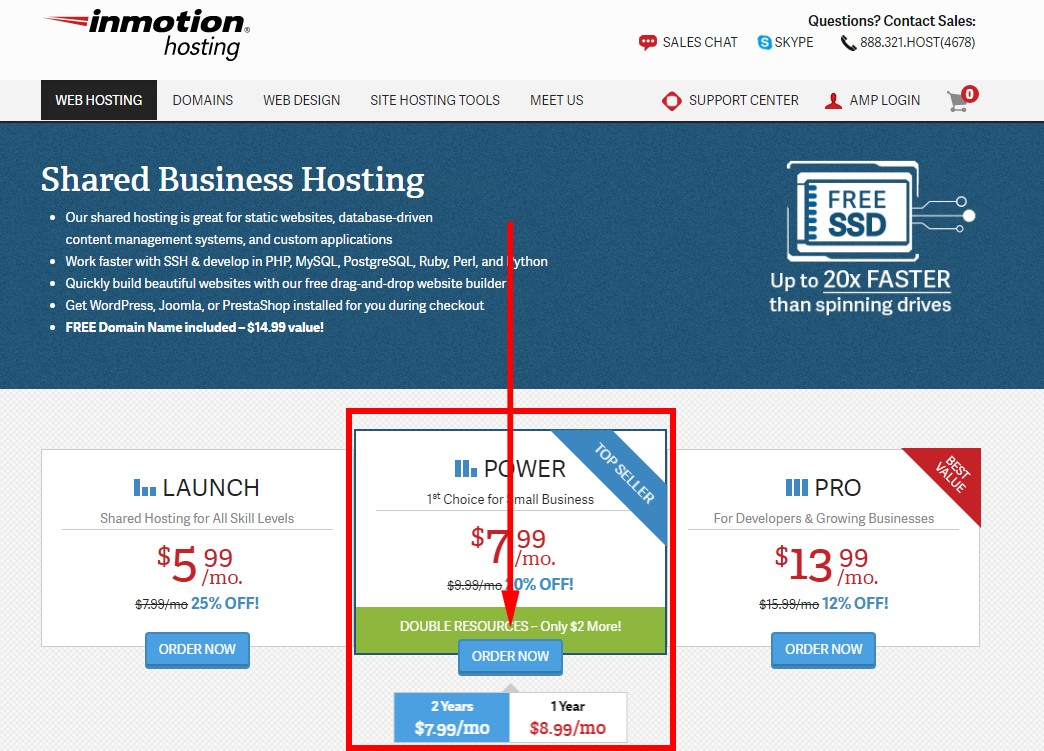
Step 1. Choose your hosting plan
Head over to www.inmotionhosting.com and take a look at their hosting plans. They offer a range of options to suit different needs and budgets.
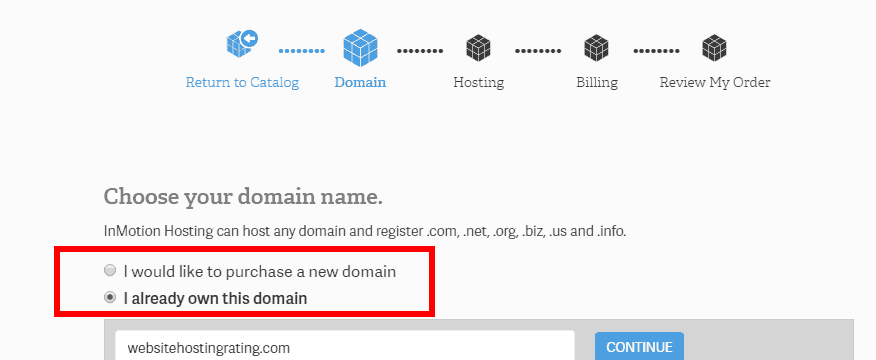
Step 2. Choose your domain name
You’ll have the option to either register a new domain name through InMotion Hosting or use an existing domain that you already own.
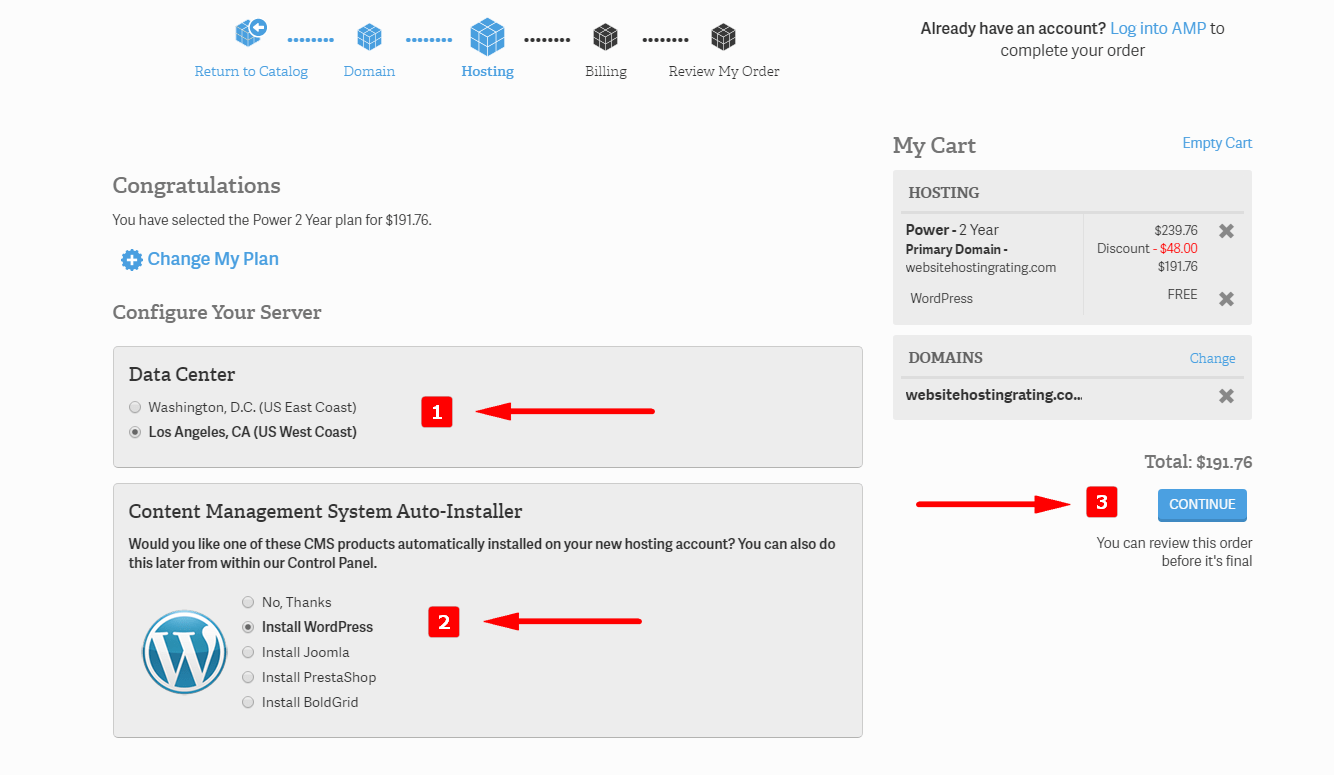
Step 3. Configure your hosting plan
Select your preferred data center location. InMotion Hosting has servers on both the U.S. East Coast and U.S. West Coast. Choose the location that’s geographically closer to your target audience for optimal website speed. If you’re unsure, their support team can help you decide.
During this step, you can also opt to have InMotion Hosting pre-install WordPress for you. This is the easiest route and I highly recommend it, especially if you’re new to setting up websites. They also offer pre-installations for other platforms like Joomla, PrestaShop, and BoldGrid, but we’ll focus on WordPress in this guide.
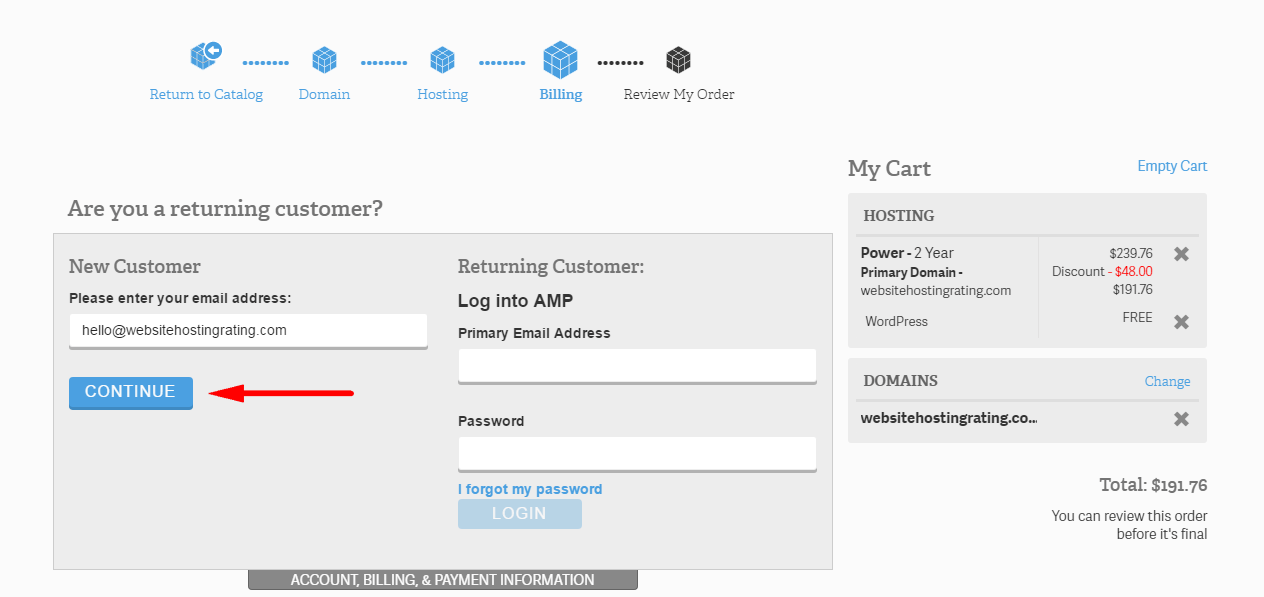
Step 4. Create your hosting account
Provide your email address and click continue to proceed.
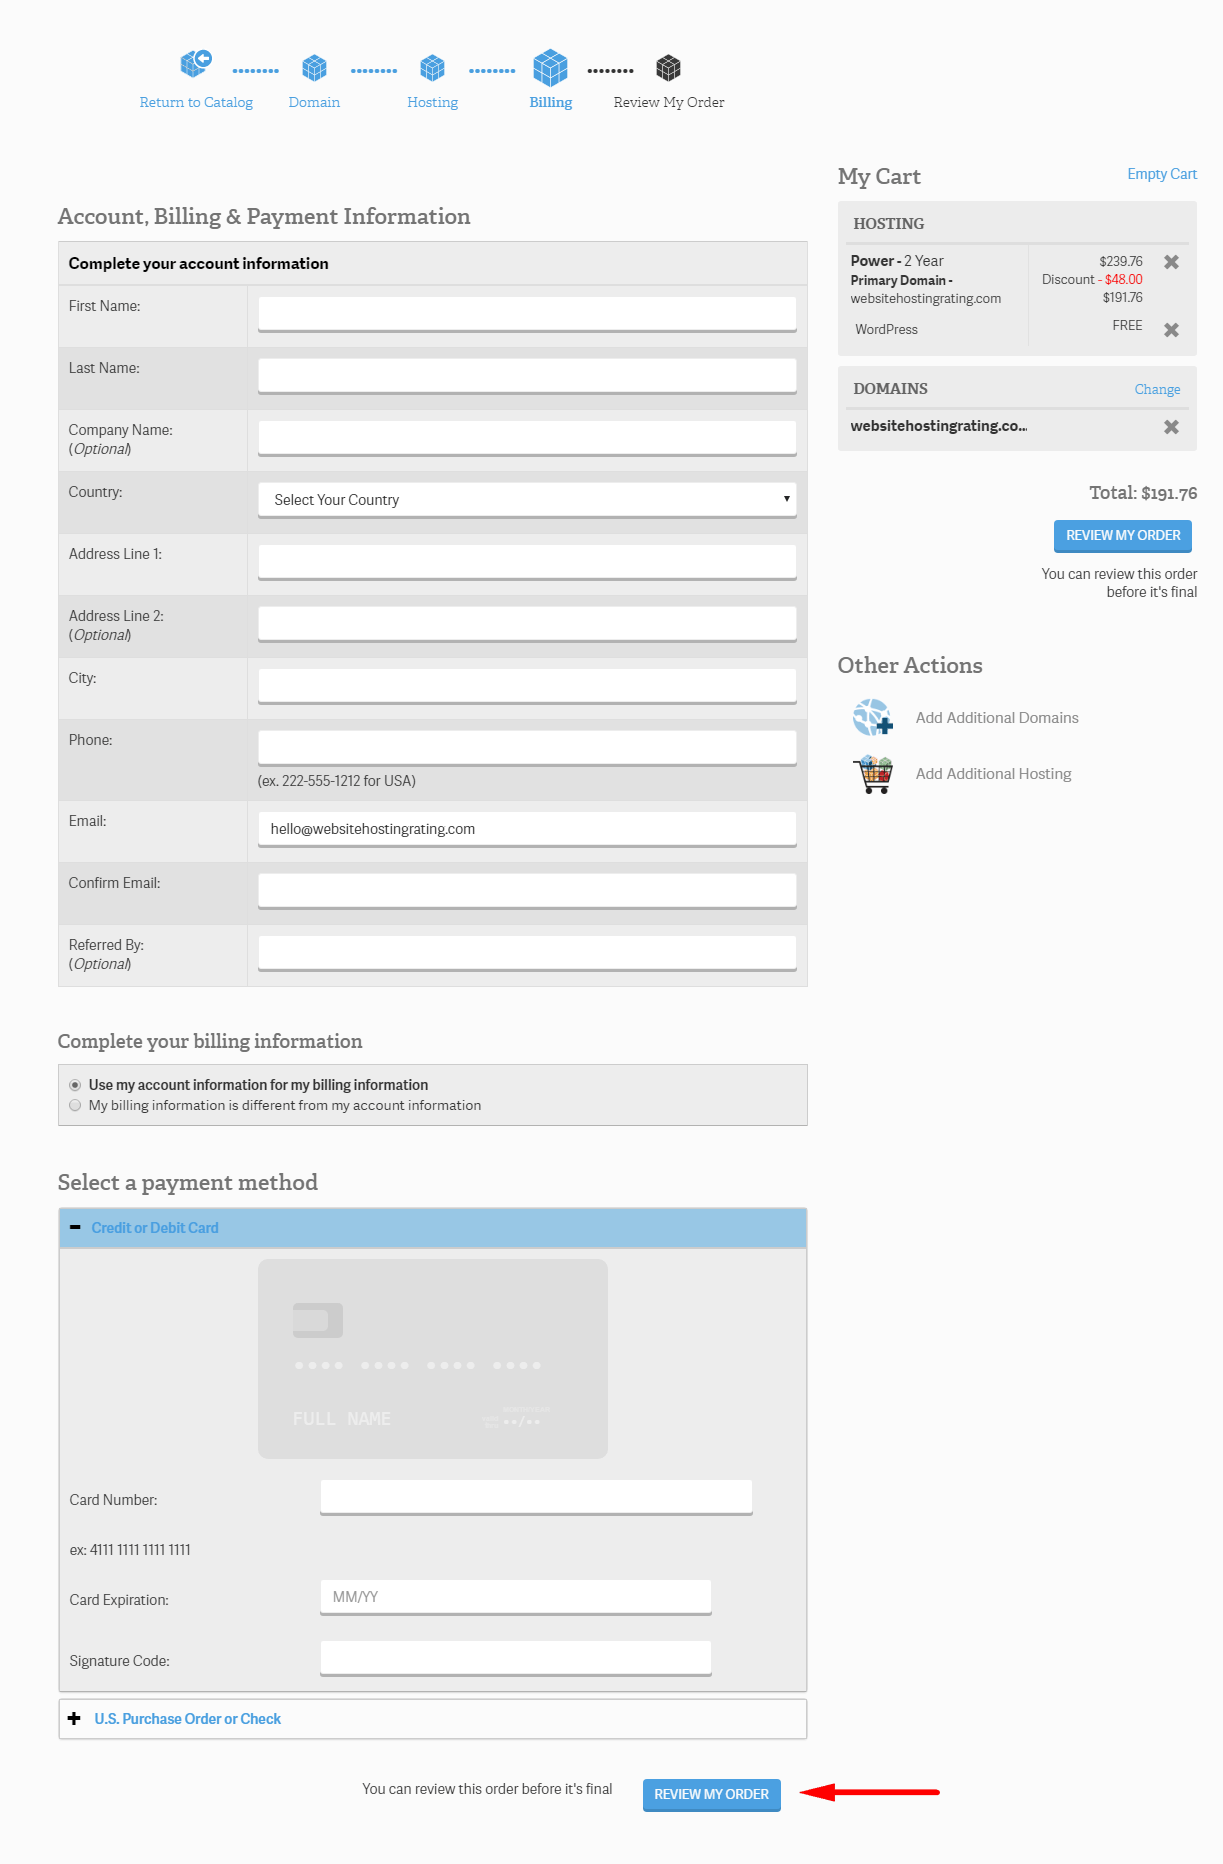
Step 5. Fill out your account details
You’ll be asked to fill in your personal information, including your name, address, and contact details. Choose your preferred payment method from the available options.
InMotion Hosting accepts major credit cards (Visa, MasterCard, American Express, and Discover) as well as payments via check and money order. Once you’ve reviewed your order and submitted it, you’re officially signed up with InMotion Hosting!
Now, let’s move on to getting WordPress installed on your new hosting account.
How To Install WordPress On InMotion Hosting
As mentioned earlier, the easiest way to install WordPress on InMotion Hosting is to have it pre-installed when you sign up (as outlined in the steps above). If you chose that option, you can skip the steps below and jump right into customizing your WordPress website.
If you didn’t opt for pre-installation, don’t worry! You can easily install WordPress yourself using a tool called Softaculous. Here’s how:
How to install WordPress on InMotion using Softaculous
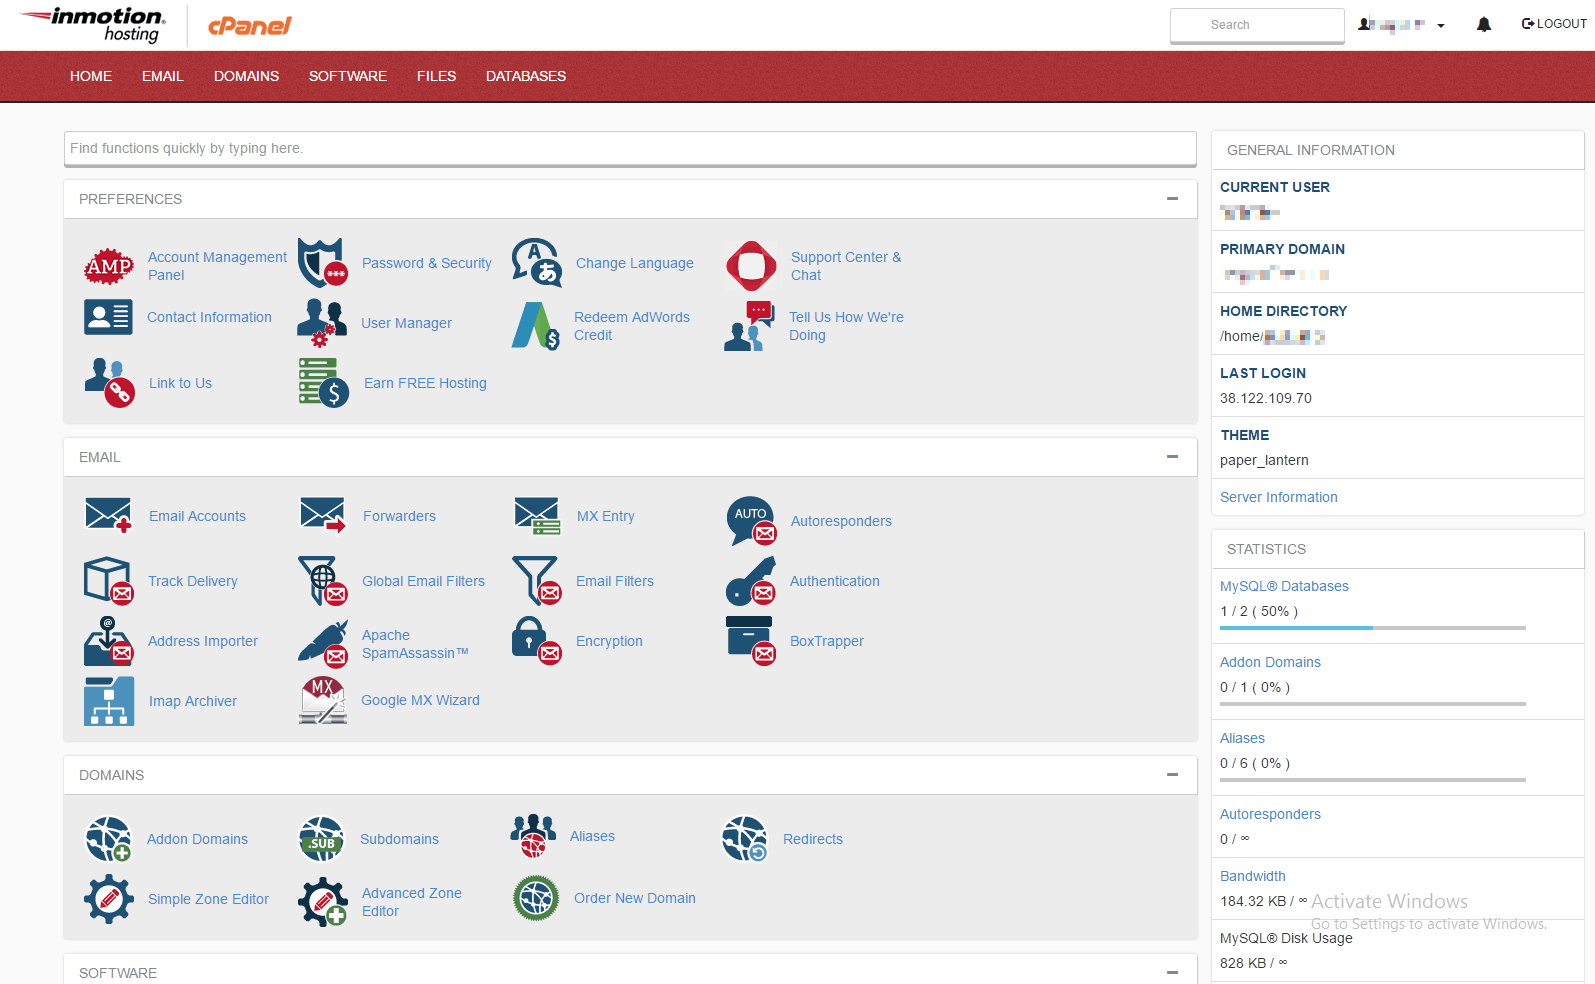
- Step 1. Log in to your InMotion Hosting Account Management Panel (AMP). This is your central hub for managing your hosting account.
- Step 2. Locate and click on the cPanel button, usually found under your account name. This will redirect you to your cPanel dashboard. You can also access cPanel directly by typing domainname.com/cpanel into your browser’s address bar (replace domainname.com with your actual domain name).
- Step 3. In your cPanel, find the Softaculous Apps Installer section (the exact name might vary slightly). Look for the WordPress icon and click on it.
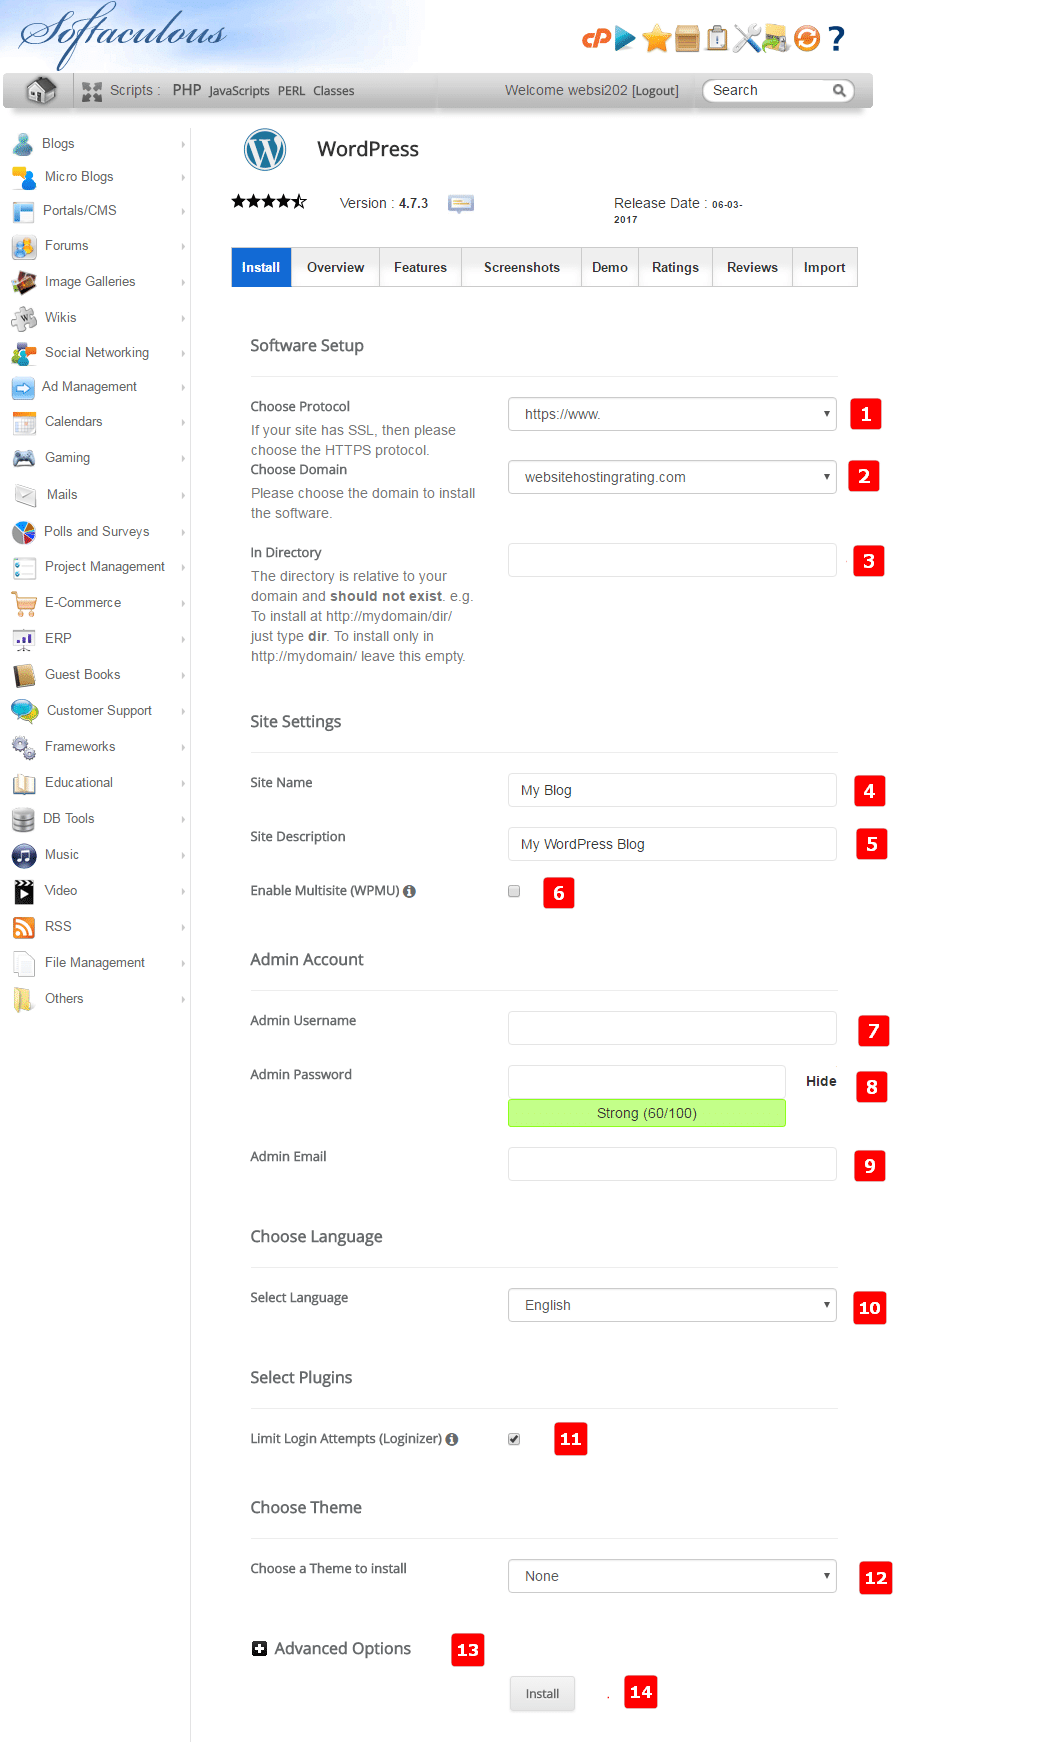
- Step 4. You’ll see an overview of the WordPress installation process. Click the Install Now button to proceed.
- Step 5. Now you’ll configure your WordPress installation. Here’s a breakdown of the settings:
- Choose protocol. Select either http:// or https://. For security reasons, I strongly recommend using https://.
- Choose domain. Select the domain name where you want to install WordPress.
- In Directory. Leave this field blank if you want to install WordPress on your main domain (e.g., yourdomain.com). If you want to install it in a subfolder, enter the folder name here (e.g., if you enter “blog,” WordPress will be installed at yourdomain.com/blog).
- Site Name. Enter the name of your website.
- Site Description. Write a brief description of your website.
- Admin Username. Create a username for logging in to your WordPress dashboard.
- Admin Password. Set a strong password for your WordPress dashboard.
- Admin Email. Enter your email address. This is where WordPress notifications and login details will be sent.
- Select Language. Choose your preferred language for the WordPress interface.
- Limit Login Attempts. It’s a good security practice to enable this option. It helps protect your website from brute-force attacks.
- Choose a theme to install. You can select a theme now, but I recommend choosing and customizing your theme later from within the WordPress dashboard, where you’ll have more options.
- Advanced Options. You can usually leave these settings at their defaults.
- Install. Once you’ve reviewed your settings, click the “Install” button at the bottom of the page. Softaculous will handle the rest!
- Step 6. Once the installation is complete, you’ll receive an email with your WordPress login details (the URL to access your dashboard, your username, and password). Keep this information safe.
That’s it! You’ve successfully signed up with InMotion Hosting and installed WordPress. You now have a solid foundation for building your website or blog. Log in to your WordPress dashboard and start bringing your online vision to life!
Wrap Up
InMotion Hosting makes getting started with a WordPress website remarkably easy. The signup process is straightforward, allowing you to choose your plan, domain, and options in a few simple steps. Their one-click WordPress installation, often integrated directly into the signup process, streamlines everything.
From landing on their website to having a live WordPress site, you’re looking at a process that can be completed in under an hour – even as a beginner. This ease of use is a major reason why I often recommend InMotion Hosting to individuals and businesses looking for a hassle-free hosting experience.